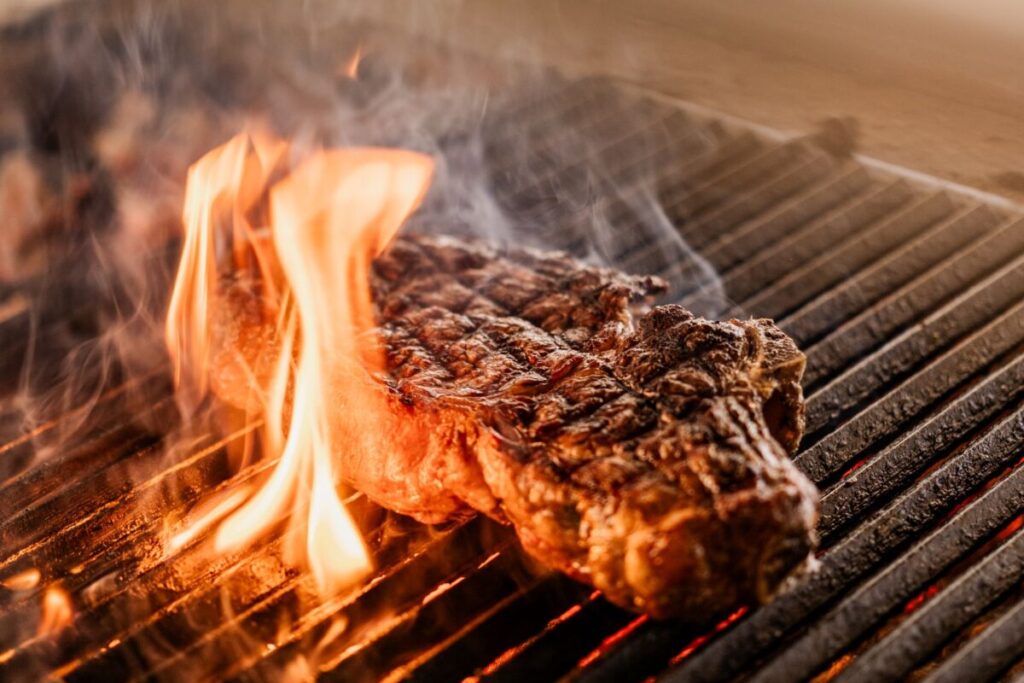
A great crust on a steak isn’t luck, and it isn’t about having an expensive pan or a restaurant-grade burner. You just need to understand one specific chemical process and how to set up the conditions that allow it to happen. A lot of home cooks end up with a grey, leathery, steamed-looking piece of meat, but with this method you can finally get that perfect sear on steak.
This guide covers the science behind a good sear in plain terms, exactly what kills a crust before it forms, and a step-by-step method that works on any stovetop or on the grill. Follow this process once and you’ll understand why it works, which means you’ll be able to apply it to every protein you sear, not just steak.
Quick Answer: How Do You Get a Perfect Sear on Steak?
Dry the steak surface completely, season with salt at least 45 minutes ahead or immediately before cooking, preheat your pan until very hot, add a thin coat of high smoke-point oil, place the steak in the pan, and don’t move it until the crust releases naturally. The Maillard reaction, which is the chemical process that creates browning and crust, requires a dry surface and high heat. Both conditions must be present.
The Science Behind a Good Sear
The crust on a properly seared steak comes from the Maillard reaction — a chemical process in which amino acids and reducing sugars on the meat’s surface react under heat, above approximately 280°F (140°C), producing hundreds of new flavor and aroma compounds and the classic deep brown color. This reaction is responsible for most of the complex, roasted, savory flavor we associate with seared meat, grilled food, and toasted bread.
Two conditions consistently prevent the Maillard reaction from happening at the surface: moisture and insufficient heat. A wet surface can’t exceed 212°F (100°C) because any available energy goes into evaporating the water before the temperature can rise. This causes the meat to steam instead of sear resulting in a grey color, soft texture, and minimal flavor development. A pan that’s not hot enough produces the same result even from a dry surface.
Everything in the searing process below is designed to address exactly these two obstacles and can be used for any kind of meat you might be searing.
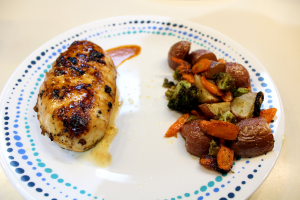
Seared Lemon Garlic Chicken
Practice searing other meats with our Lemon Galric Chicken recipe. It is super easy while also being healthy! It goes great with roasted vegetables on the side.
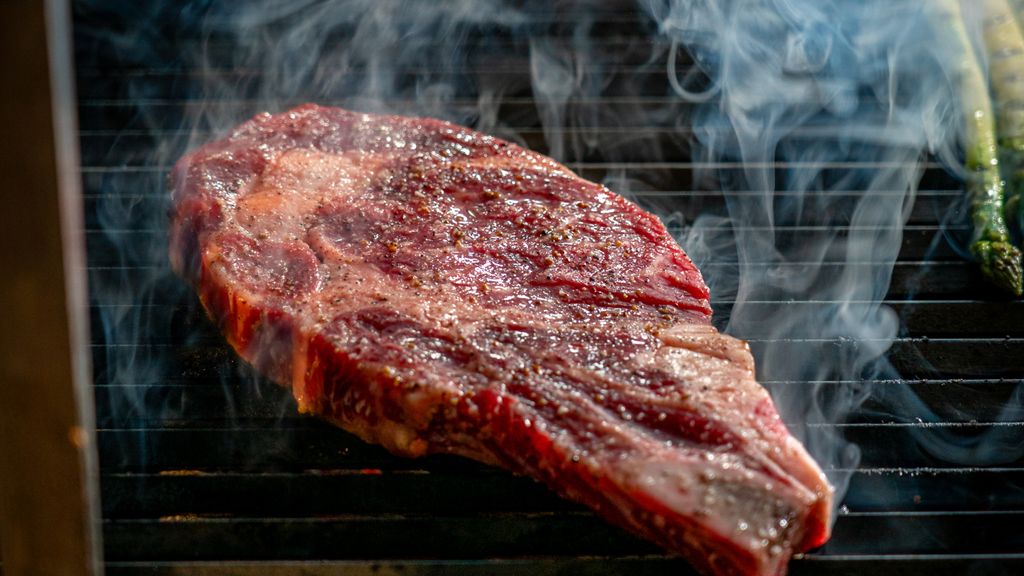
Pat the steak thoroughly dry with paper towels on all surfaces, including the edges. For the best possible results, place the steak uncovered on a wire rack set over a sheet pan and refrigerate it for two to eight hours, or overnight. The cold, dry air of the refrigerator pulls surface moisture away progressively, leaving a surface that’s almost papery in texture. That surface sears almost instantaneously when it contacts a hot pan.
This step alone is the single most impactful thing most home cooks can add to their steak routine. The difference between a patted-dry steak and a refrigerator-dried steak in terms of crust quality is significant and immediate.
Salt Timing
Salt draws moisture to the surface through osmosis, which is exactly what you don’t want for the sear. The solution is to salt either at least 45 minutes before cooking (allowing enough time for the drawn-out moisture to be fully reabsorbed, along with the dissolved salt, which also seasons the meat internally) or immediately before the steak goes in the pan, with no waiting period.
The problematic window is roughly 5–40 minutes after salting, when surface moisture is present but hasn’t been reabsorbed. If you’re short on time, salt immediately before cooking. If you can plan ahead, salt and let it rest uncovered in the fridge for several hours which also helps dry the surface.
Bring to Near Room Temperature
Cold protein from the refrigerator takes longer to cook through, which means more time in the pan. More time in the pan means more risk of the exterior overcooking while the center catches up. Pulling the steak 30–45 minutes before cooking doesn’t fully bring it to room temperature (that would take hours for a thick cut) but it reduces the thermal gap enough to make a meaningful difference, especially for thick steaks.
Pan Searing: Step-by-Step
Choose the Right Pan
We highly recommend using cast iron or stainless steel. Nonstick pans cannot safely reach the temperatures required for a proper sear and prevent the fond development that makes seared meat taste genuinely complex. Cast iron is the preferred choice for most steaks because its thermal mass means the pan doesn’t lose temperature when the cold steak hits the surface, producing a more even, faster crust.
Place the empty pan over high heat for 3 minutes (stainless) or 4 minutes (cast iron). Don’t add oil yet as oil burns if it sits in a hot pan too long. To test readiness: flick 3 drops of water into the pan. If they evaporate immediately with a sharp hiss, the pan needs another minute. If they bead into a single mercury-like ball and skitter across the surface before evaporating (Leidenfrost effect), then the pan is ready.
Add a thin coat of high smoke-point oil like avocado oil, grapeseed oil, refined vegetable oil, or refined coconut oil. Swirl to coat the pan. Heat for 30–45 seconds until the oil shimmers and just begins to show the first wisp of smoke. Do not let it smoke heavily.
Place and Don’t Touch
Place the steak away from you into the pan. The oil may spit when the steak makes contact, and tilting the pan away from you as you lay it in prevents splashing toward your wrist. You should hear an aggressive, consistent sizzle. If the sizzle dies quickly, the pan lost temperature; increase the heat.
Do not press the steak down. Do not move it. Leave it completely undisturbed for 2–3 minutes depending on thickness and desired crust depth. The steak will stick to the pan initially — this is normal and expected. As the Maillard reaction develops the crust, the protein will release naturally. If you try to move it early and it resists, give it another 30–60 seconds.
Flip and Baste
Flip once. You should see a dark, even, deeply browned crust on the first side. Sear the second side for the same duration. For a steak 1.5 inches or thicker, use tongs to hold the steak on its edges (particularly the fat cap) to render the fat and sear the sides for 60–90 seconds each.
Once flipped, add 1–2 tablespoons of unsalted butter, a crushed garlic clove, and 2–3 sprigs of fresh thyme or rosemary to the pan. As the butter foams, tilt the pan toward you slightly and use a large spoon to continuously baste the top of the steak with the butter for 60–90 seconds. This adds flavor, fills in any uneven areas of crust, and helps finish the internal temperature.
Searing on the Grill
On a grill, achieving a proper sear requires a very hot direct heat zone. For charcoal, a full chimney of coals concentrated beneath the grate. For gas, all burners on high for 10–15 minutes with the lid closed before cooking. The grate itself should be preheated.
Apply the same surface rules: dry steak, high heat, don’t move early. For steaks 1 inch or less, grill over direct heat the full time. For steaks 1.5 inches or more, the grill is the ideal environment for the reverse sear method and doing two-zone grilling.
The Reverse Sear: Superior Results on Thick Cuts
For steaks thicker than 1.5 inches, the reverse sear produces more even doneness with an equally excellent crust. Place the steak on a wire rack over a sheet pan and cook in a 250°F oven (or on the indirect side of a grill) until the internal temperature reads 115°F for medium-rare or 125°F for medium (roughly 25–45 minutes depending on thickness).
Remove the steak and immediately sear it in a ripping-hot cast iron pan or over direct grill heat for 60–90 seconds per side. Because the surface dried out during the slow cook, the sear happens almost instantly. The result is a steak with a deep, uniform crust and perfectly even doneness from edge to edge with no grey band of overcooked meat just beneath the surface.
Rest Before Cutting
A properly seared steak must rest before cutting. The juices inside are under pressure while the meat is hot. Cutting immediately releases them onto the board. Five to eight minutes of rest for a 1-inch steak, eight to ten for a thick ribeye, allows the temperature to equalize and the fibers to relax and reabsorb the displaced moisture. Tent loosely with foil. Don’t skip this. It may seem like a waste of time at first, but you will see the difference it makes.
Frequently Asked Questions (FAQs)
Why does my steak not get a crust?
The most common causes are a wet surface, an insufficiently preheated pan, or using nonstick cookware. The Maillard reaction requires a dry surface and temperatures above 280°F. Pat the steak completely dry, preheat cast iron or stainless steel for 3–4 minutes, and don’t move the steak until the crust releases naturally.
What is the best oil for searing steak?
Use a high smoke-point oil like avocado oil (520°F smoke point), grapeseed oil (420°F), or refined vegetable oil (400°F+). Extra virgin olive oil and butter have lower smoke points and will burn before the pan reaches searing temperature. Add butter only after the initial sear, for basting.
Should I cook steak on high heat the whole time?
For thin steaks (under 1 inch), high heat throughout works well. For thick steaks (1.5 inches+), the reverse sear — low heat first, then a brief high-heat sear — produces significantly more even doneness and an equally good crust. High heat throughout a thick steak produces a grey, overcooked band just beneath the surface.
What is the reverse sear method for steak?
The reverse sear means cooking the steak first at low heat in a 250°F oven or on the indirect grill side until it’s 10–15°F below target internal temperature, then searing briefly in a very hot pan. This produces edge-to-edge even doneness and an excellent crust because the surface is already dry from the slow cook.
How do I know when to flip the steak?
Flip when the steak releases naturally from the pan — typically 2–3 minutes over high heat. If it resists when you try to move it, the crust isn’t fully formed yet. Wait 30–60 seconds and try again. A properly seared side will detach cleanly. For thin steaks, you can flip more frequently (the constant-flip method) to achieve even cooking.
Do I need to season steak before searing?
Yes. Season generously with kosher salt either immediately before cooking or at least 45 minutes ahead. Avoid salting 5–40 minutes before cooking, when drawn-out surface moisture hasn’t been reabsorbed. For best results, salt and refrigerate uncovered for several hours. This also dries the surface, improving crust formation.
Hi, I’m Dylan, the recipe developer, cook, and photographer behind Cooked & Baked, which I run alongside my girlfriend, Jill. Together, we share homemade recipes focused on real ingredients, approachable cooking, and bold flavors.
Most of my time in the kitchen is spent cooking, grilling, and smoking everything from simple comfort foods to slow-cooked barbecue favorites. Outside the kitchen, I also enjoy gardening and using fresh homegrown ingredients in our recipes whenever possible, especially fresh herbs and seasonal vegetables.
Manage Consent
To provide the best experiences, we use technologies like cookies to store and/or access device information. Consenting to these technologies will allow us to process data such as browsing behavior or unique IDs on this site. Not consenting or withdrawing consent, may adversely affect certain features and functions.
Functional
Always active
The technical storage or access is strictly necessary for the legitimate purpose of enabling the use of a specific service explicitly requested by the subscriber or user, or for the sole purpose of carrying out the transmission of a communication over an electronic communications network.
Preferences
The technical storage or access is necessary for the legitimate purpose of storing preferences that are not requested by the subscriber or user.
Statistics
The technical storage or access that is used exclusively for statistical purposes.The technical storage or access that is used exclusively for anonymous statistical purposes. Without a subpoena, voluntary compliance on the part of your Internet Service Provider, or additional records from a third party, information stored or retrieved for this purpose alone cannot usually be used to identify you.
Marketing
The technical storage or access is required to create user profiles to send advertising, or to track the user on a website or across several websites for similar marketing purposes.